
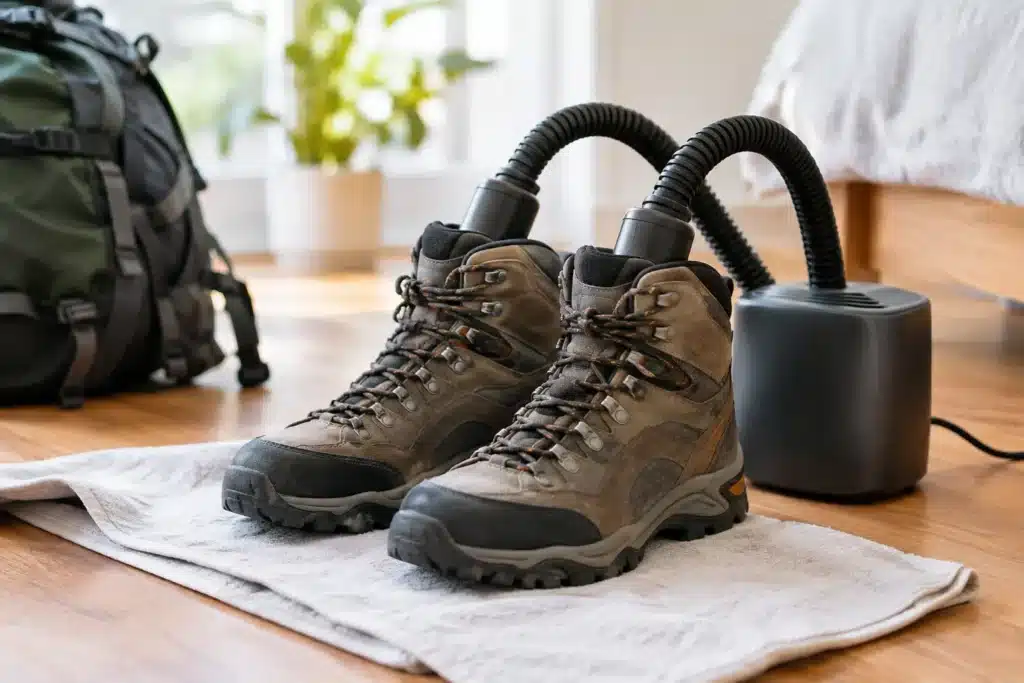
A proper Highland day can leave your boots soaked long before you reach the door. Whether you have crossed boggy ground on the West Highland Way, met rain on Ben Nevis, or simply spent the afternoon exploring in changeable weather, knowing how to get dry hiking boots overnight can make the difference between a good next day and a painful one.
The temptation is to place boots against the nearest radiator or blast them with a hairdryer. It may feel efficient, but strong heat can shrink leather, weaken adhesives, distort soles and damage waterproof linings. The safer approach is less dramatic: remove the moisture, create steady airflow and give the boots as much time as possible.
Start drying your boots as soon as you arrive
Do not leave wet boots in a rucksack, car boot or closed porch until bedtime. Trapped moisture encourages odour, gives bacteria a place to thrive and makes an already wet boot harder to dry. Deal with them shortly after getting indoors, even if they are not dripping.
First, knock off mud and grit outside where possible. A soft brush or damp cloth is enough for the remaining dirt. This matters more than it might seem: dried mud blocks breathable panels and can gradually wear at stitching and leather. If the boots are very muddy, rinse the outside gently with cool or lukewarm water, but avoid soaking them further unnecessarily.
Take out the insoles and loosen the laces fully. Pull the tongue forward to open the boot as wide as it will comfortably go. Insoles hold a surprising amount of water and dry much faster when they are laid separately in a warm, ventilated place.
How to dry hiking boots overnight with airflow
Once the boot is open, the aim is to move damp air out rather than cook the boot dry. A well-ventilated room with moderate warmth is ideal. Set boots upright, with the opening facing into the room, rather than placing them sole-up or pressed against a wall.
Pack each boot loosely with absorbent paper. Plain kitchen roll, newspaper or unprinted packing paper all work well. The paper should touch the toe area without being rammed in tightly, as tight packing restricts airflow. Replace it after an hour or two if it comes out wet, then again before bed if necessary.
A fan can make a real difference, particularly after a full day of rain. Position it so air travels across the boot openings rather than directly into one small spot. A boot dryer designed to provide gentle, unheated or low-temperature airflow is another sensible option, especially for walkers on a multi-day route.
Moderate room warmth helps, but direct heat does not. Keep boots well away from radiators, open fires, stoves, heated towel rails and portable heaters. Never put hiking boots in a tumble dryer, and do not leave them in an airing cupboard if it becomes hot and still. The outside may feel dry quickly while the inner padding remains damp, which is not the result you need.
Why direct heat causes problems
Most walking boots are built from several materials: leather or synthetic uppers, fabric linings, foam padding, rubber soles, glues and often a waterproof membrane. These components do not all respond to high temperatures in the same way. Leather can harden and crack; glue can soften or become brittle over time; and synthetic materials can lose their shape.
A boot that dries too quickly may also feel unusually stiff the next morning. That is particularly uncomfortable when you have another long stage ahead, as stiff uppers are more likely to rub at the heel and ankle.
Adjust the method for your boot material
Leather boots need patience. After they are dry to the touch, they may require a suitable leather conditioner or treatment to restore suppleness. Apply it only when the boot is genuinely dry, and use a product appropriate for the manufacturer’s recommended care routine. Some waxes and conditioners can affect the performance of a breathable membrane, so more product is not always better.
Synthetic boots usually dry a little faster than leather, but they still benefit from the same gentle treatment. Remove the insole, use absorbent paper and allow good airflow. Lightweight trail shoes can often be substantially dry by morning after this process, whereas a heavy leather hill boot may retain some dampness in the padded collar or tongue.
For boots with a waterproof membrane, remember that waterproof does not mean they cannot become saturated. Water can enter from above, work through wet socks, or soak into the outer material during prolonged rain. When the outer layer is saturated, breathability is reduced too. Drying the boot properly overnight is part of keeping that system working as intended.
Be realistic about what can dry in one night
Whether boots will be fully dry by morning depends on how wet they are, the material, room temperature and airflow. Boots that are merely damp from showers may dry overnight without difficulty. Boots that have been submerged in a burn or saturated through a day of persistent rain may need longer.
If the inside is still damp in the morning, replace the paper once more, fit dry insoles if you have them, and wear fresh walking socks. A slightly damp boot is manageable for a short day if your feet start dry and you pay attention to hot spots. A sodden boot is different: it increases the chance of blisters, cold feet and discomfort.
It is worth carrying a small spare insole or lightweight camp shoes on a walking holiday. Spare insoles can give your feet a drier surface while the original pair finishes drying, and camp shoes allow you to air your boots as soon as you stop without needing to wear wet footwear around your accommodation.
Common drying mistakes to avoid
The most damaging mistake is putting boots directly on a radiator. Even if it appears to work once, repeated high heat shortens the life of the materials that hold the boot together. Placing them close to a fire has the same risk, along with the obvious safety concern.
Leaving wet socks inside the boots overnight is another unhelpful shortcut. Take them out immediately, wash or rinse them if required, and hang them separately. Wet socks pressed into the toe box only hold moisture where you most need dryness.
Avoid stuffing boots with glossy magazines or heavily printed paper. Ink can transfer to pale linings when wet, and coated pages absorb very little. Do not use loose rice either. It is difficult to remove from seams and eyelets, and airflow with absorbent paper is more effective.
Finally, do not judge dryness only by touching the outside. Put a dry hand inside the toe area, feel beneath the tongue and check the insole. These are the places that tend to remain wet after the outer has dried.
Use a drying room when your route demands it
For walkers, climbers and cyclists in Fort William, a drying room removes much of the uncertainty from an overnight stop. It gives wet outer layers, boots and kit a dedicated place to dry without filling your bedroom with damp gear or relying on a radiator. At Guisachan Guesthouse, the drying room is particularly useful after a wet West Highland Way stage or a changeable day in the hills.
Even in a drying room, prepare boots properly first. Remove insoles, open the laces and shake out excess water. Good facilities help, but airflow still needs a route into the boot rather than around a tightly closed upper.
Check your boots before setting off
In the morning, fit dry or mostly dry insoles and put on clean, dry socks. Check that the lining is not bunched up, that the tongue sits correctly and that no grit has worked into the heel cup. If your laces are wet, loosen them briefly and work them through your fingers before tying them, as damp laces can tighten differently once you begin walking.
For another wet day, carry a small amount of paper in a waterproof bag. It weighs very little and is useful for absorbing moisture during a lunch stop or when you reach your next overnight halt. A few careful minutes each evening are kinder to your boots, and far kinder to your feet, than trying to rescue them with too much heat.